Old Wood
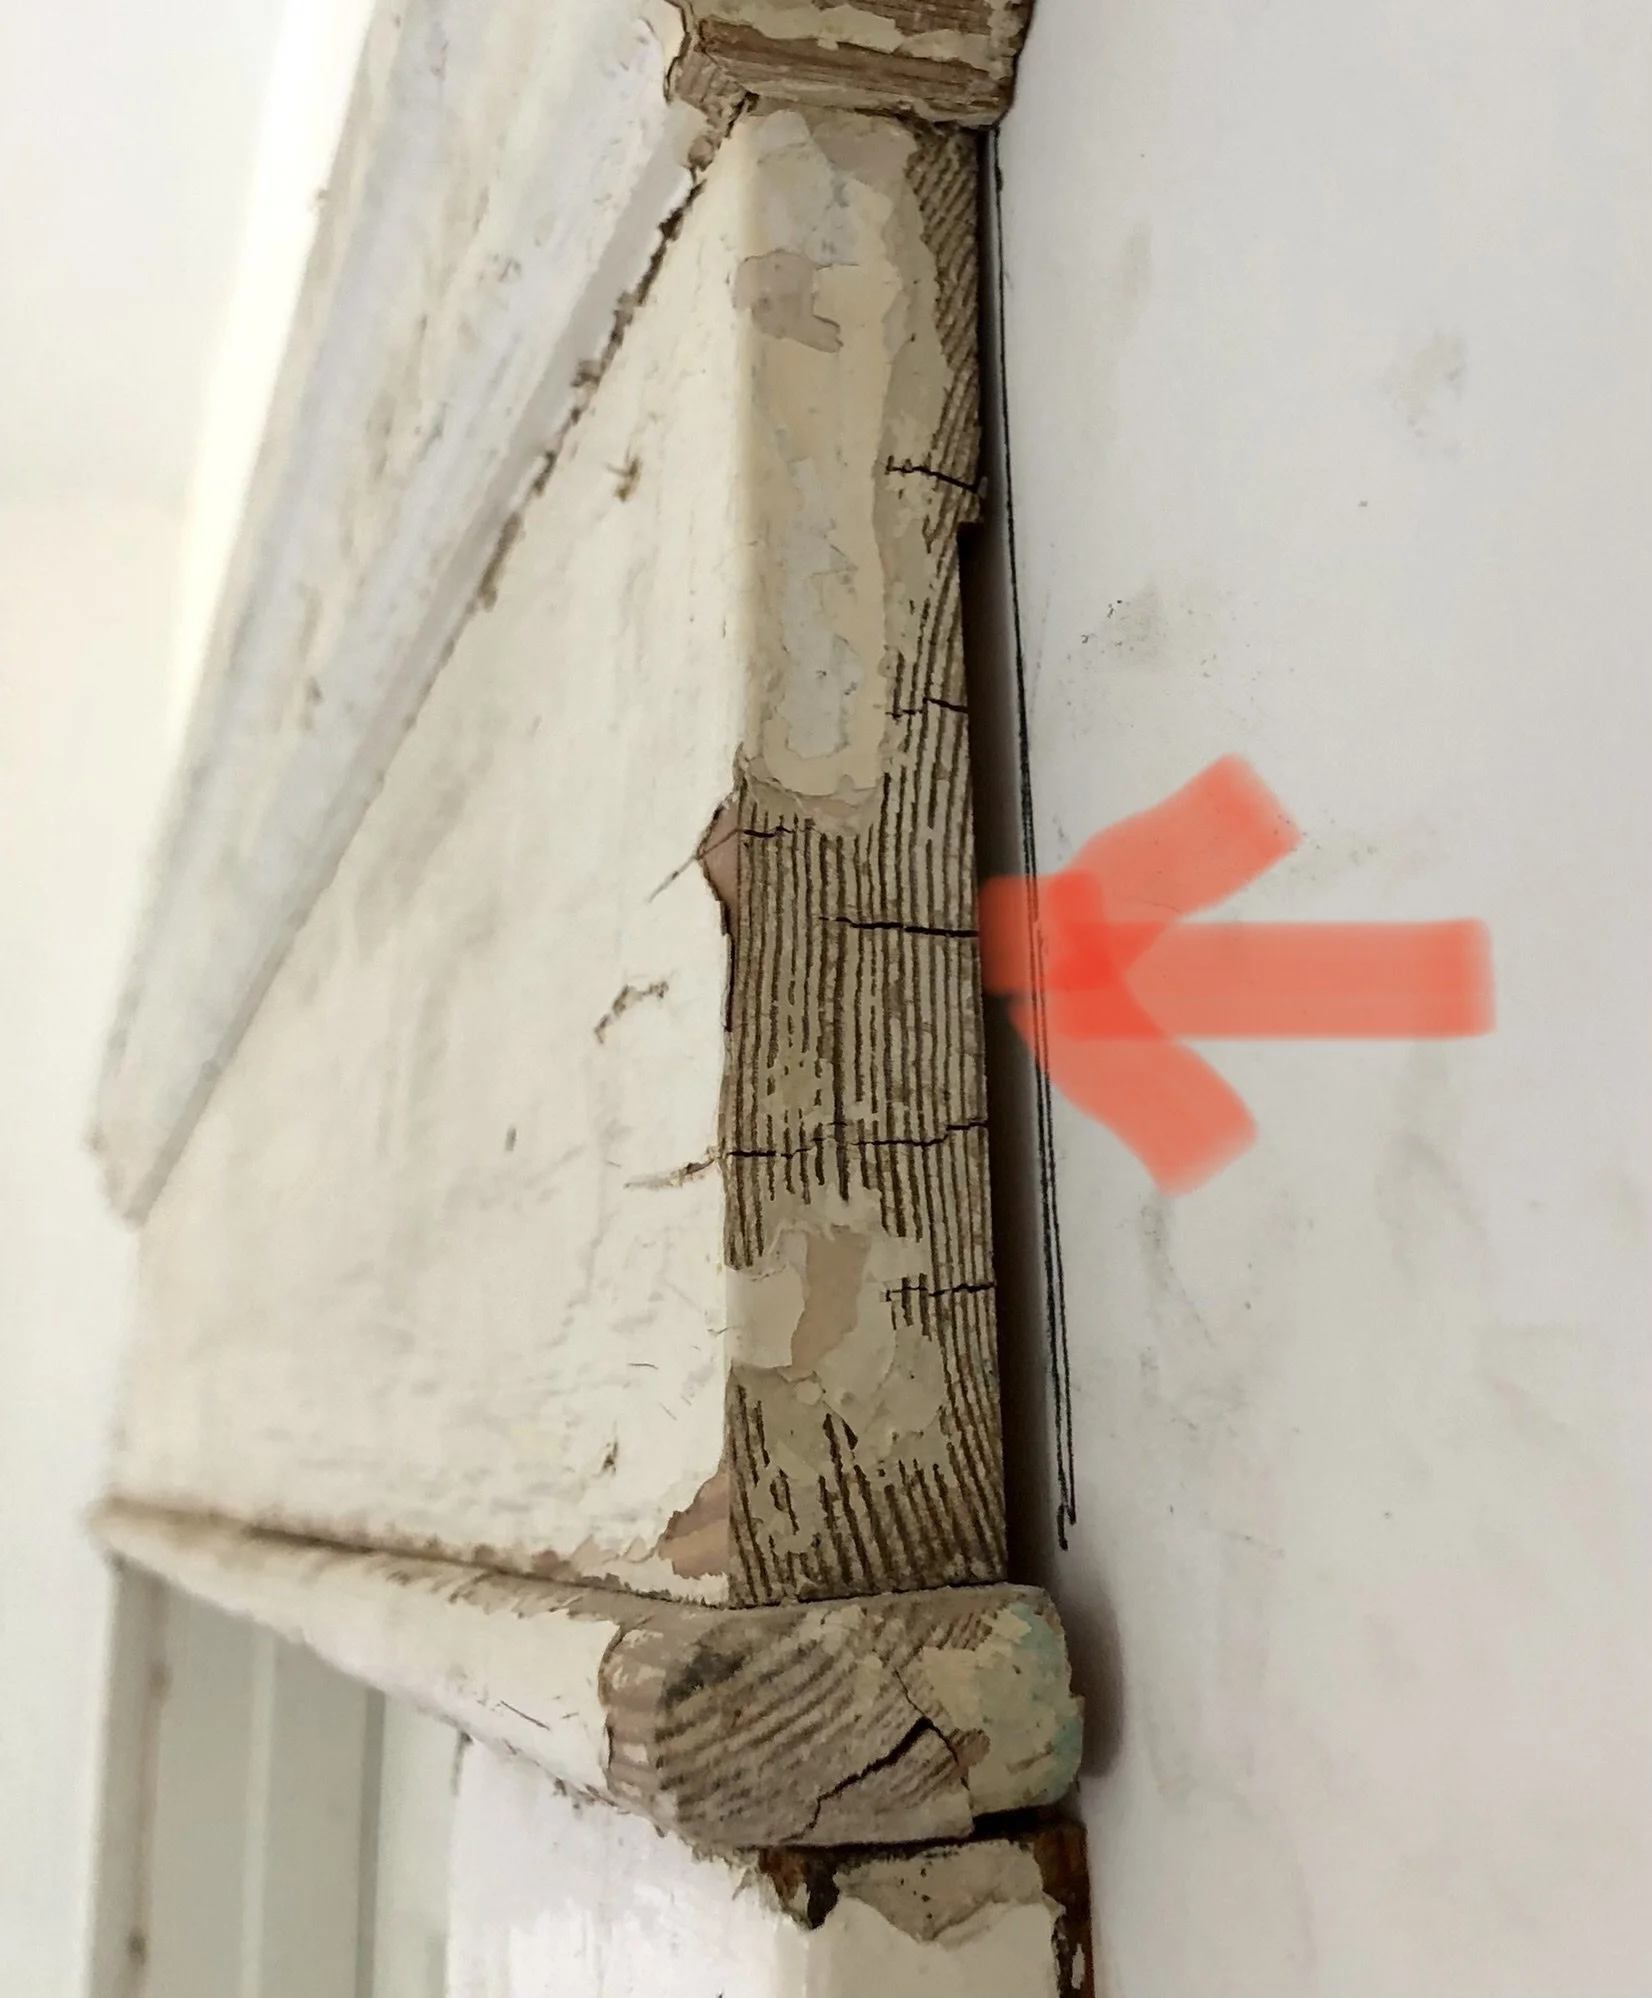
We know from lead detection and small glimpses where the paint chipped off the wood that the original wood finish in the living room and the dining room was a dark brown stain, probably with a shellac coating on it. You know that shellac is made from beetle excretions? From the lac bug—I kid you not. I will have to have a conversation with the painters about period-correct finishes at some point, since I don’t think that simply clear coating things is going to produce the finish look we need. But for now I am just letting the painters get on with the stripping, since there is a LOT to do.
The wood finishes outside of the living and dining rooms (bedrooms, baths, etc.) were painted historically, as one would expect on this type of house. A lot of people allow their enthusiasm for restoring unpainted wood to go a little too far (in my opinion) and strip paint from the trim and windows in all rooms of their bungalows, but this doesn’t reflect the way most bungalows were treated historically. What does lead detection tell us? The living and dining room trim was revealed to have no lead in the paint, while there was lead detected in the painted trim of all the other rooms. Why? Because only the living and dining rooms were painted for their first time as the industry moved to a post-lead-paint era. The outright ban came in 1978, but the trim was likely painted prior to that date and just didn’t have a lead formula for whatever reason. But lead was much more prevalent in the early 20th century paints.
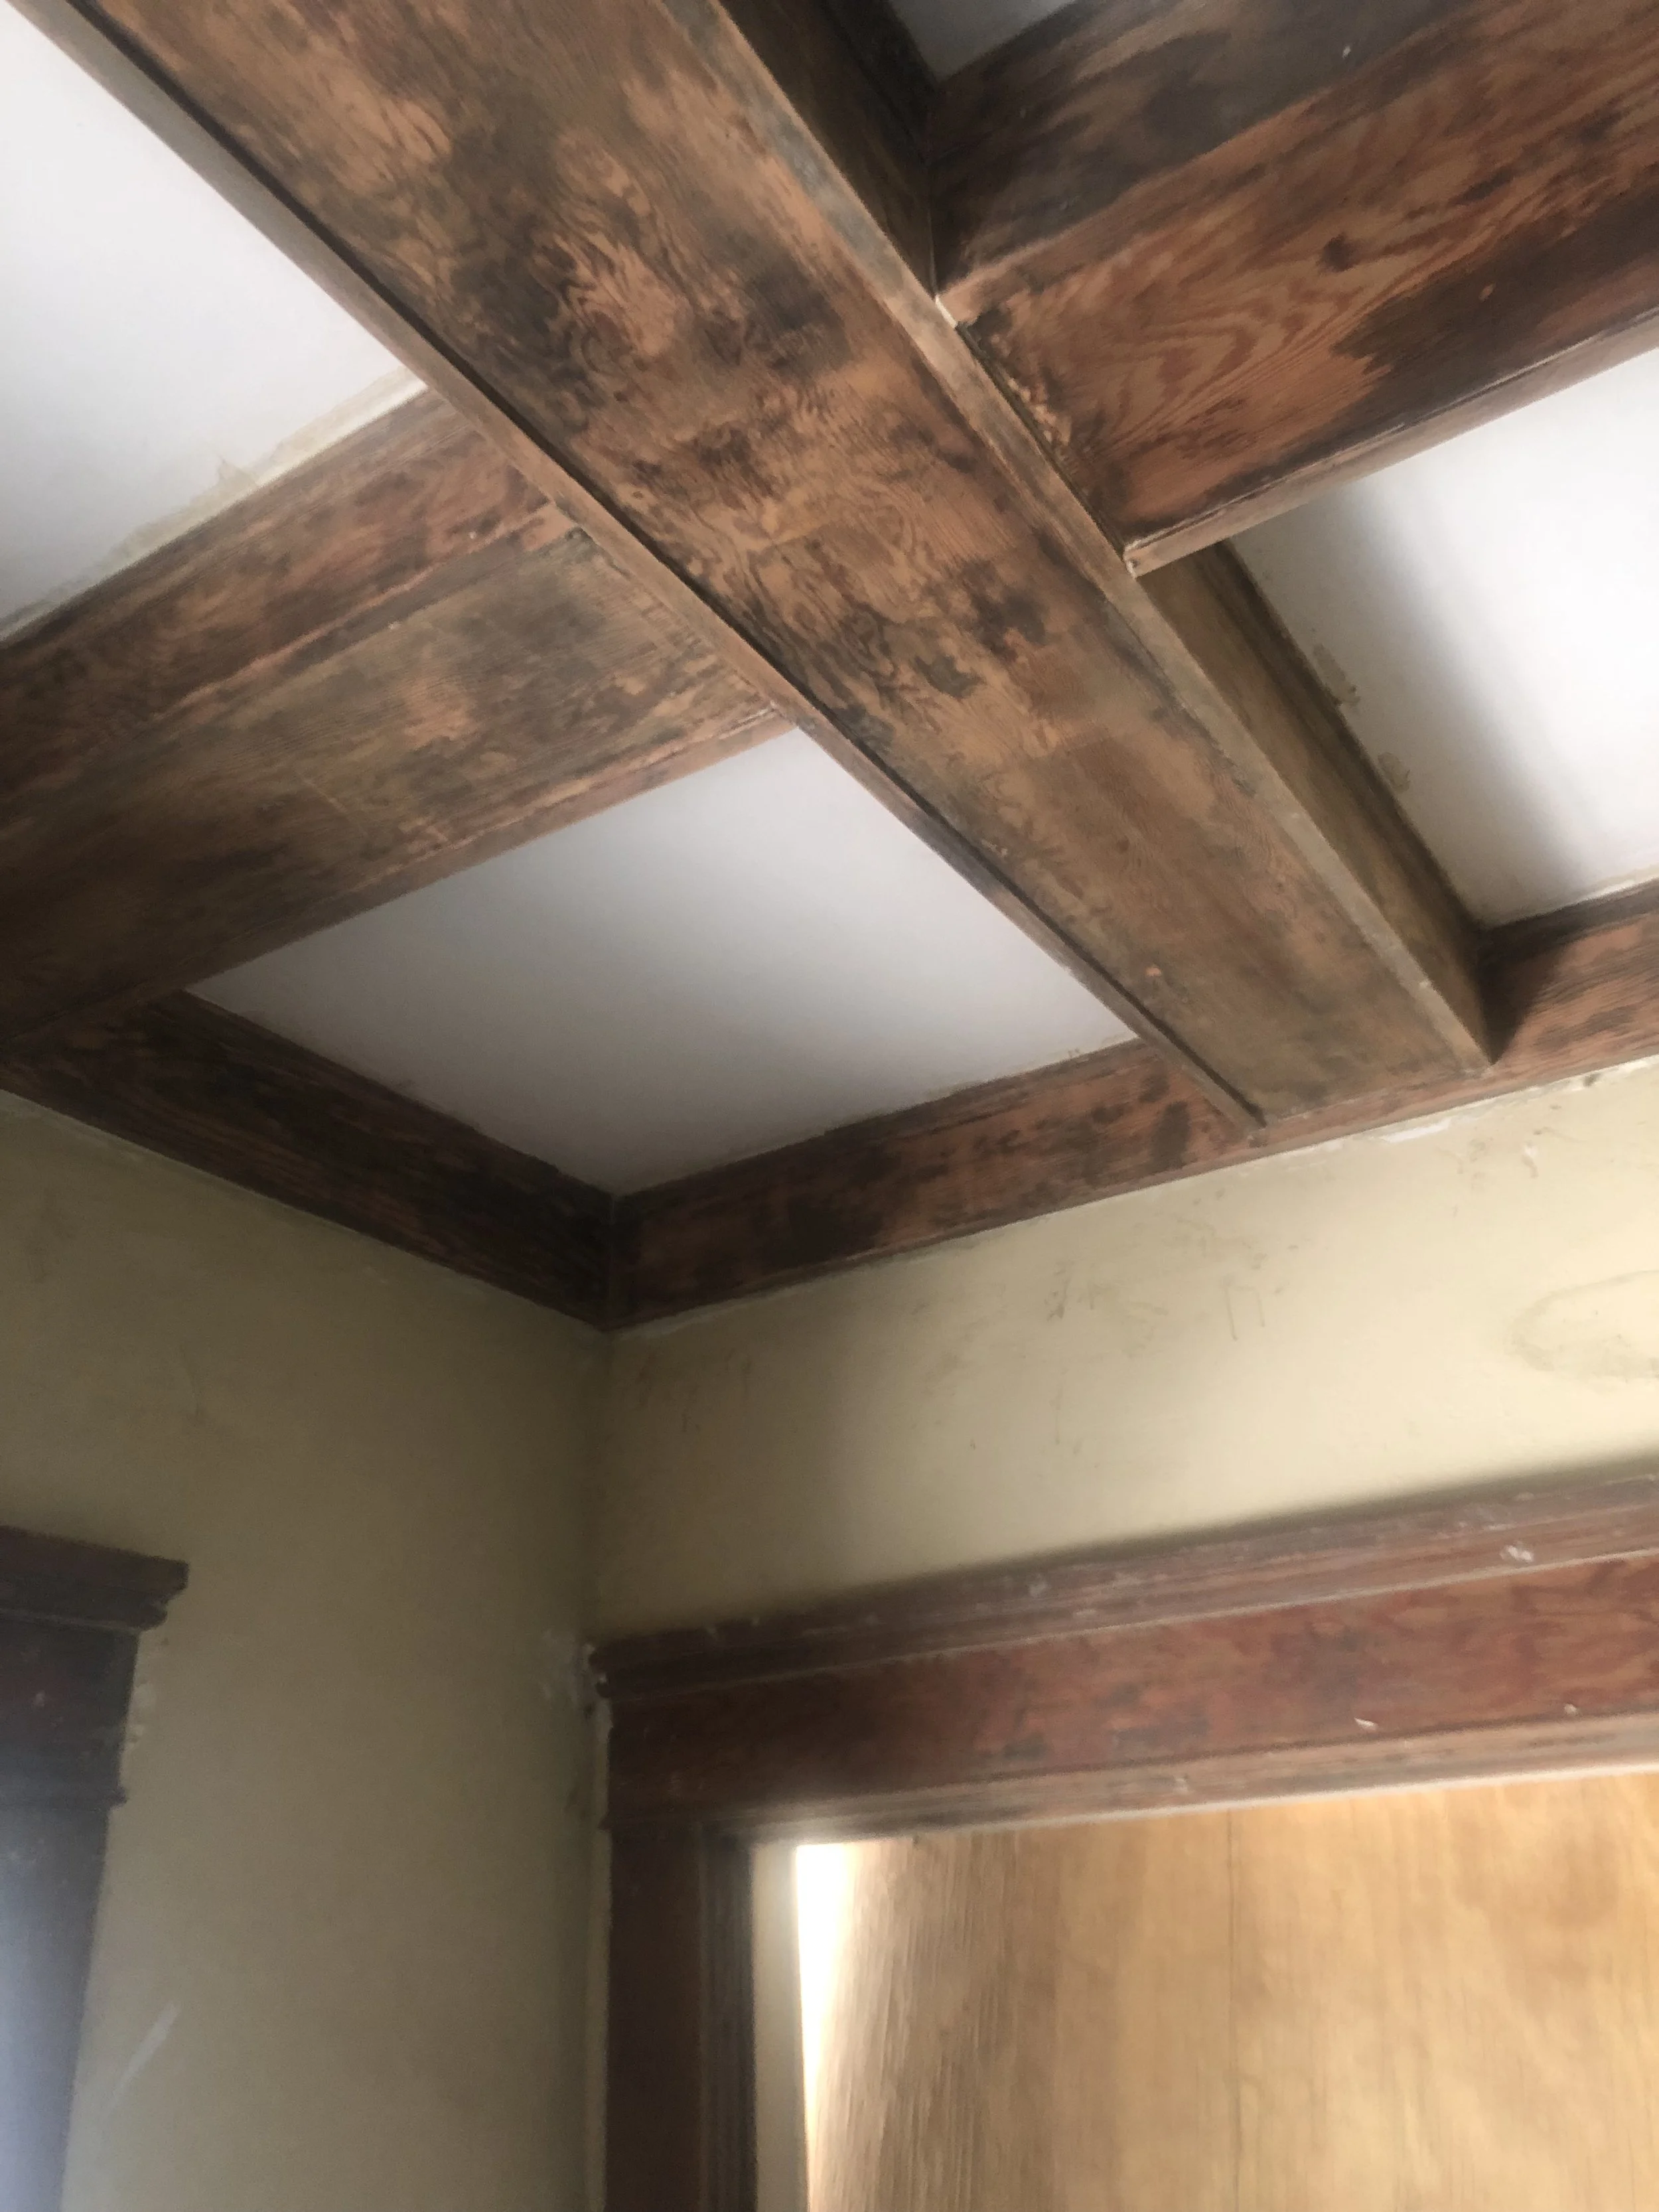
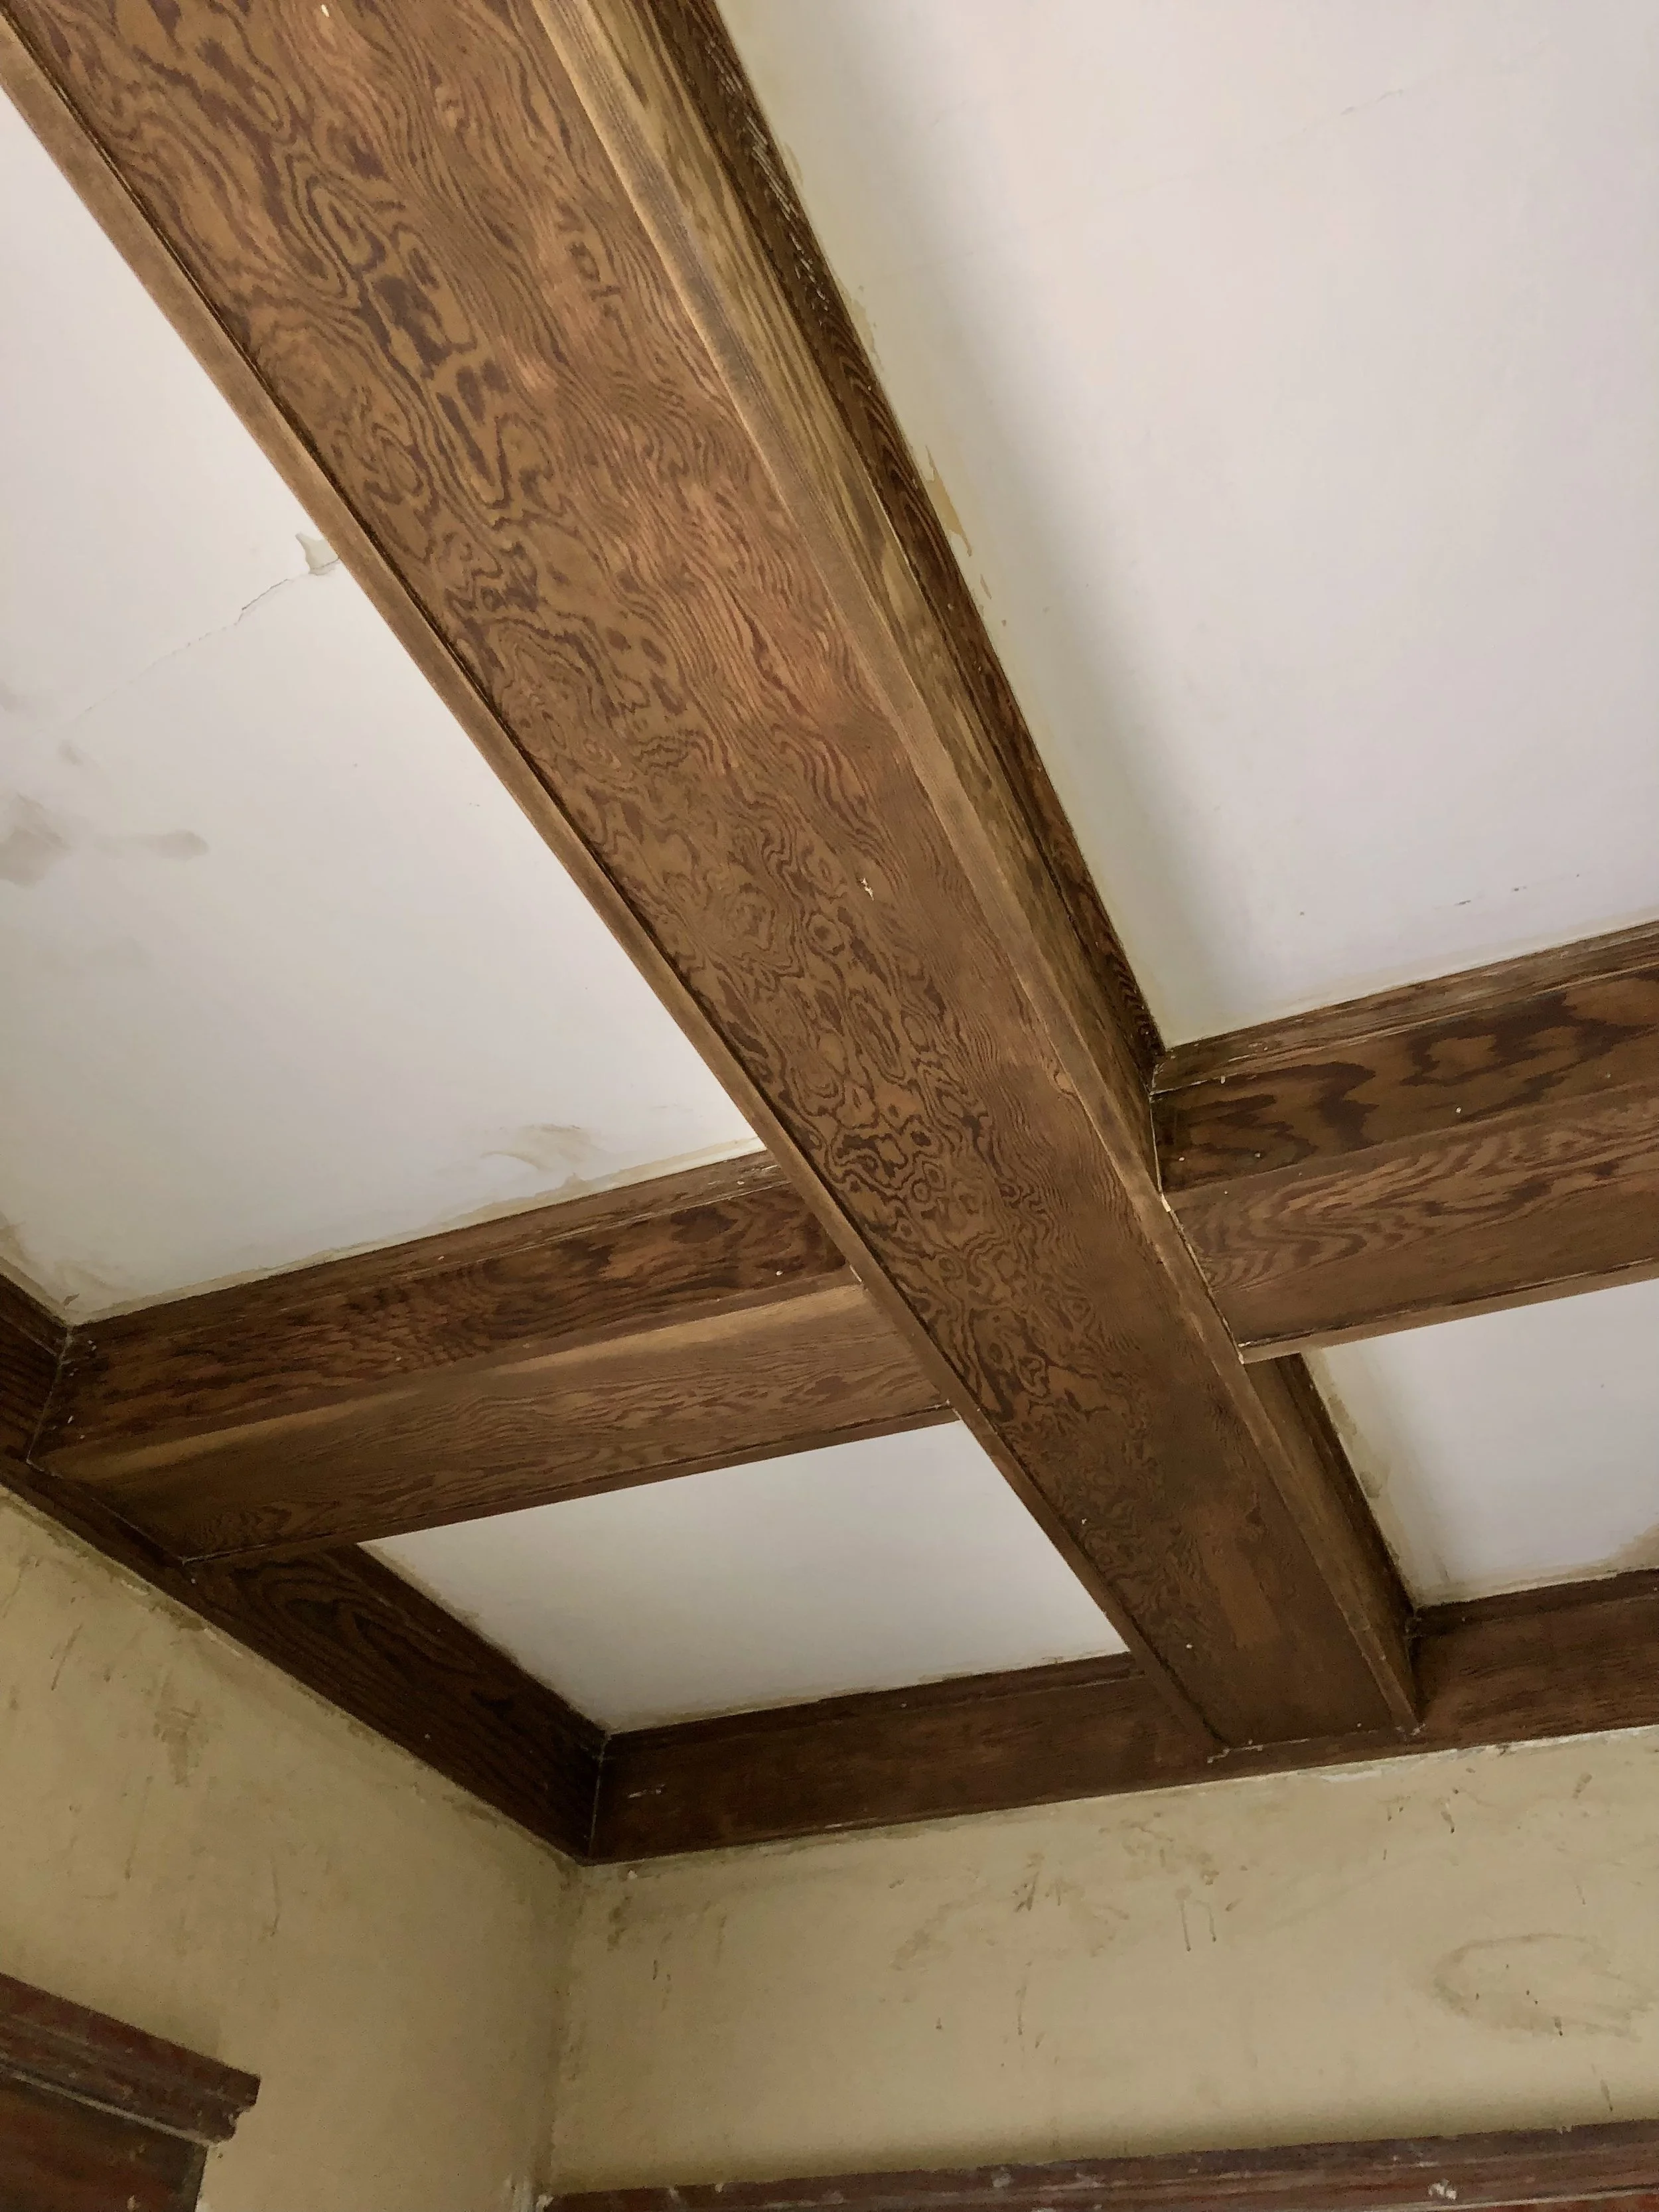
Based on this, we decided to remove the paint from the living and dining room trim. Fortunately (in this instance, I guess) the house has a minimum of woodwork. The biggest part of the job is the 90 or so lineal feet of ceiling box beams. The 7.5” deep baseboard is another big job— another 90 feet around the perimeter—but at least it’s just a simple plank.
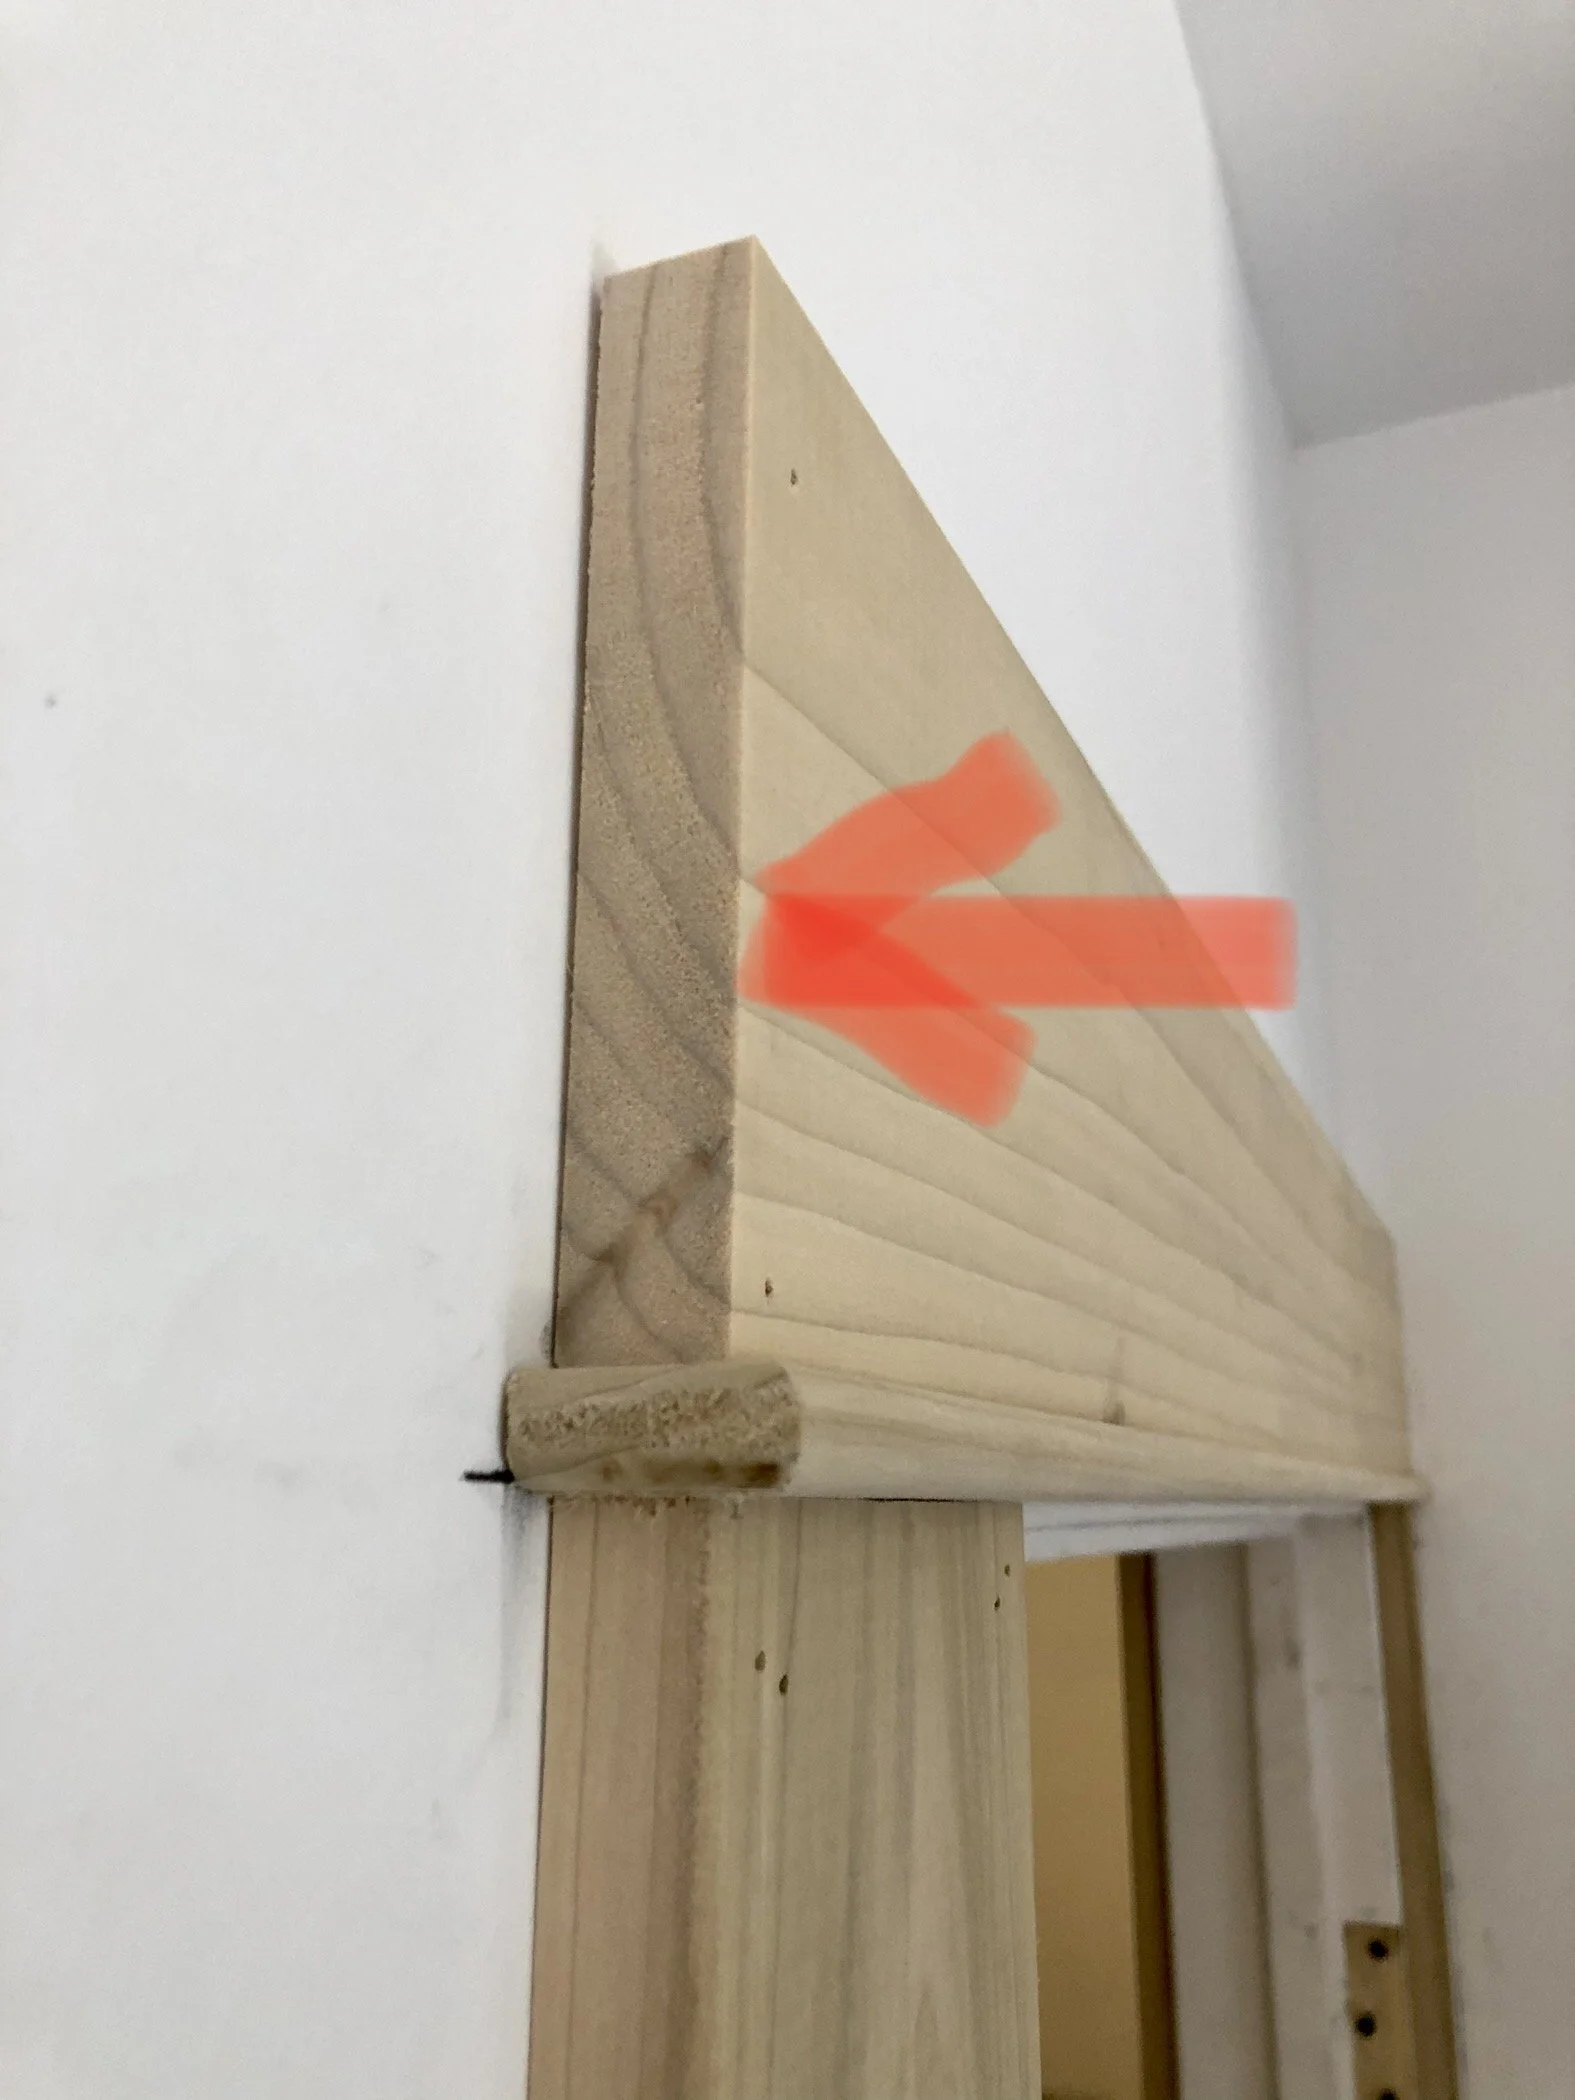
They did a few test patches six months or so ago and found this:
All of that was as expected—certainly nothing fancy, but plain old stained Douglas fir with that crazy, wavy grain. I didn’t expect straight grain or anything gorgeous. This is the most common type of wood trim around the Los Angeles area, and it was most often stained very dark which minimizes the crazy grain a bit without completely masking the figuring.
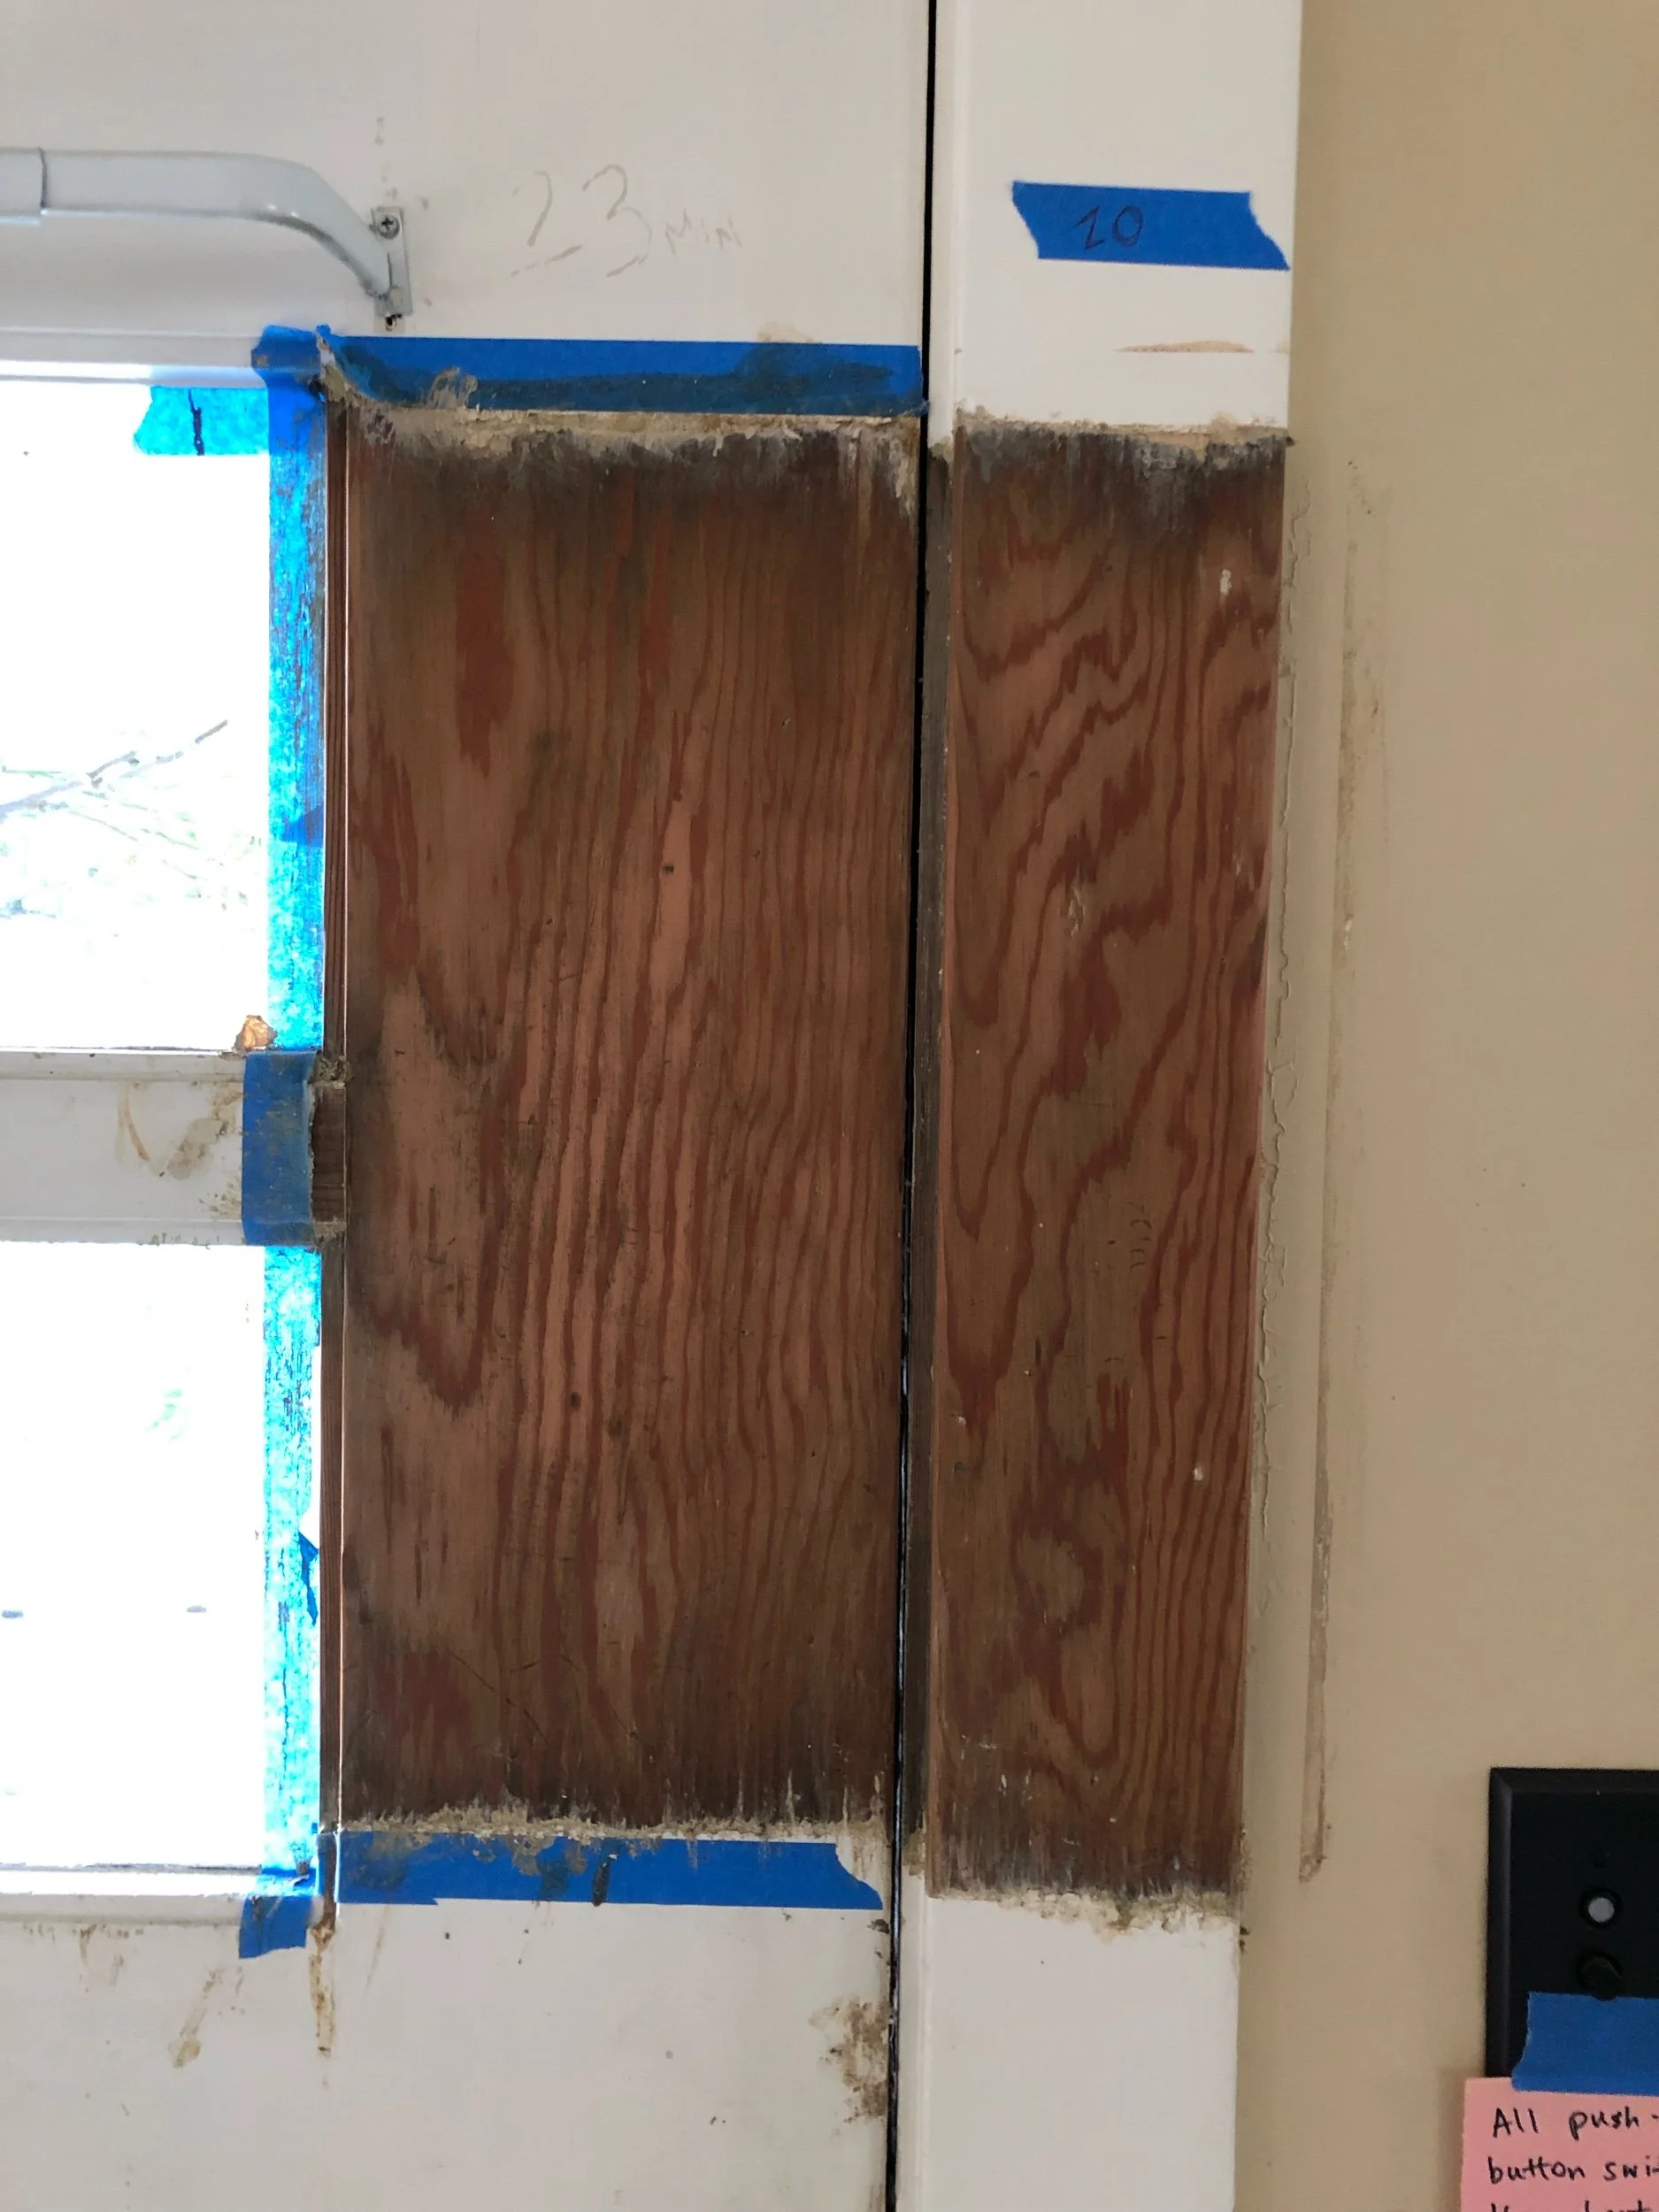
Since the process of removing all this paint began, we have been watching nervously. The stages along the way really were not pretty, and there were several points when I wondered if we’d be able to pull this off. The results were splotchy and not presentable at all.
I asked the contractor about the disparity between the pristine test patches and the not-great-looking overall results so far, and he shook his head and said that those were done by the painter who would have charged $55,000 for the job. Ohhhh! But come on—we can see what is under there, and we agreed that they just needed to try harder!
On Friday I stopped by in the morning to talk over a few details (there’s always a few details), and on our way through the living room at the end I saw the crew brushing some liquid onto the beams. I assumed it was water, which can help you to see how the consolidated surface will look. He said, “No, they’re bleaching it to get rid of that discoloration,” which I took to be a final act of desperation. I said, “Well! Let’s see how that turns out!” and the contractor smiled and exhaled—for him, almost a laugh. Oh, boy.
We returned in the afternoon to see that the whole ceiling had been brushed. And you know what? It looked pretty darn good! It was an even brown tone, the grain looked good, and there was no blotchiness! On Saturday morning I wondered if it would have dried to a funny fir-pink, but we went back and looked and it still looked even and brown! It’s not over, but it’s looking like this cockamamie, expensive plan of ours may yield something decent.
I’ve decided not to spend any more time considering the wall color in there until I see what the whole room looks like: new, lighter oak floor (a story/excuses for another post); final fir trim color; clean, repaired plaster; and light from all the windows. The operable windows have been boarded up for a few months because all the casement hardware is out at the metal refinisher waiting its turn for treatment.
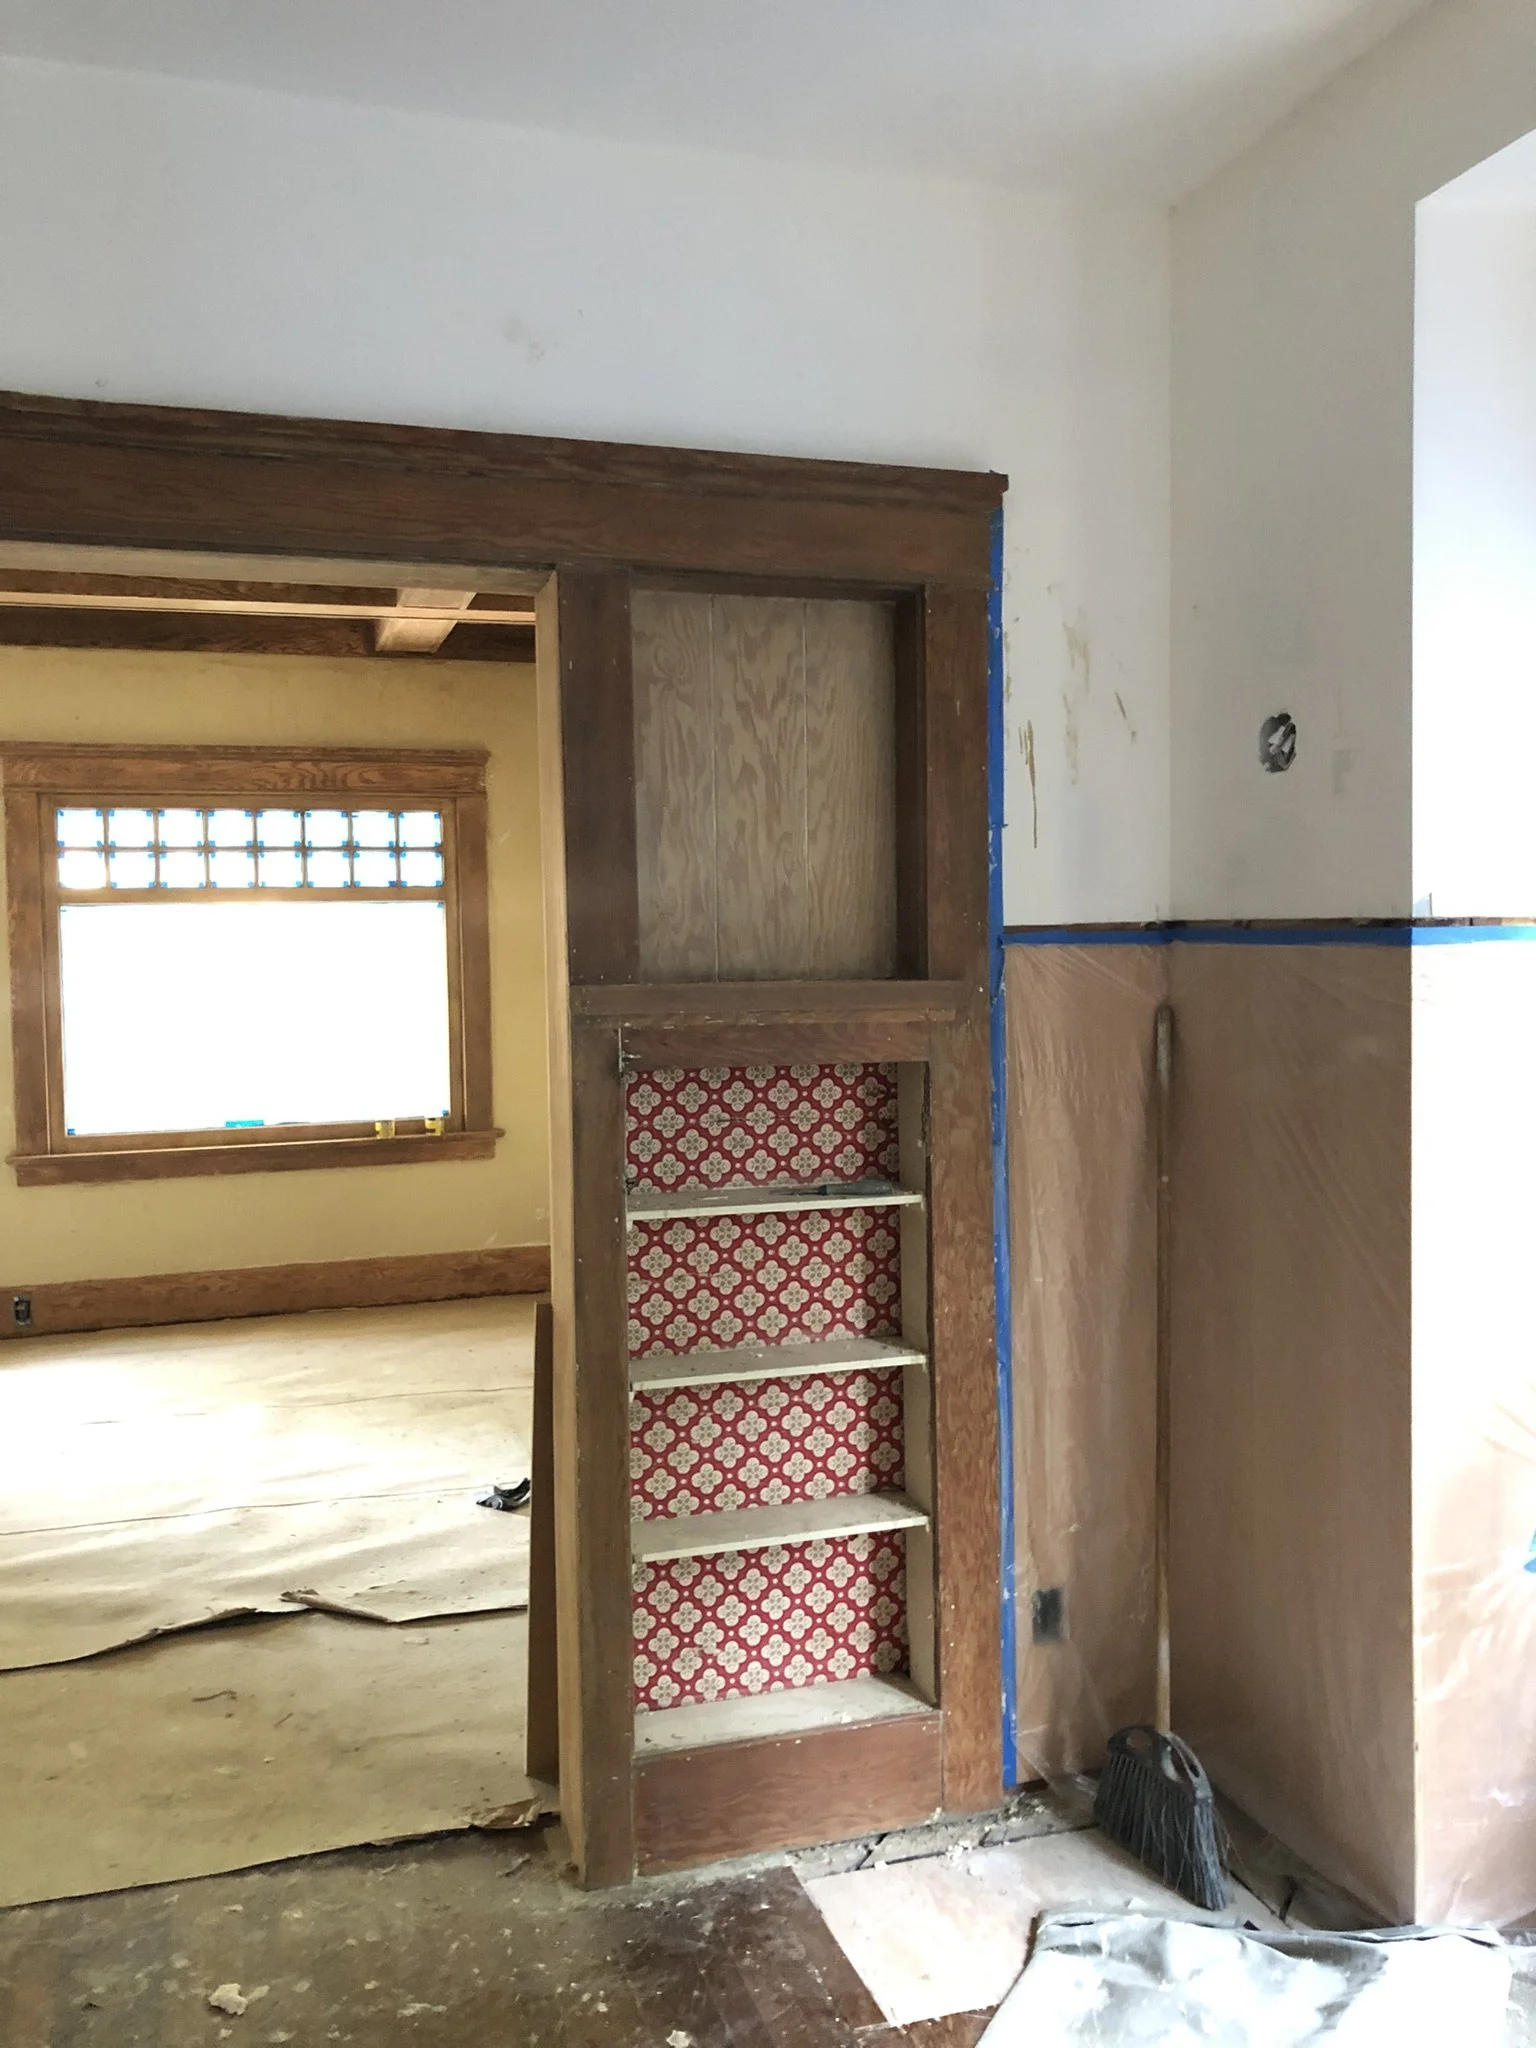
In the dining room, the window casing has been put back in place. They had taken it all down because the window was noticeably crooked—they had to remove the whole assembly, shim the opening to adjust it, and reset the whole window. If only I had a week of my life back for every such delay! But where was I—the dining room. The challenge here will be integrating the appearance of the old wood and the new wood, since we are adding fir board and batten wainscoting 5’ high all the way around the room.
The dining room, at least, had far less wood to strip: just the old casing and two double-hung windows and the cased opening between the living room and dining room. There are no ceiling features and no built-ins. Even the picture rail wasn’t original—it had been replaced with a tiny cove molding for reasons I cannot guess at. We removed the baseboards because of the new board and batten wainscoting that’s going in. The character of these rooms is changing so much!
I will leave you with this comparison, below: on the left, the tight ring pattern of slow-grown, presumably old-growth Douglas fir. On the right, new poplar, the wood that’s being used for all the painted trim we are adding—its many fewer growth rings speak to its lower density and much faster growth. When we pick up a length of old molding (like an old picture rail), it’s striking how heavy it is for its size. Missing from the right photo is the cap for the casing, which is still out being milled.