
It’s Electrifying!
This is nothing much to look at so not a lot of photos here, but the electricians have been there for many long days, rewiring our ENTIRE house. It’s very satisfying, after seeing all that knob and tube that was removed and seeing the neat new installation go in! As I mentioned previously, the remaining, active knob and tube wiring was confined mostly to the ceiling fixtures, so a load of a single bulb (and now LED, so just a few watts) was not going to overload the poor old things. But with the extent of the work happening now, there was no question that this is the moment to rewire every single thing. Here is how wiring got around inside the walls in 1910:


Everyone has heard tales of the horrors of knob and tube wiring. Hey, it worked for a long while, and in its day it was a safety improvement! Knob and tube came into use after 1900. In the photos above, taken of the inside of our walls before electrical demo, the black is the insulated wiring, and you can see how it’s wrapped around the porcelain knobs that guide it and secure it as it runs through the walls. This was an improvement over the wood conduit (combustible, after all, unlike porcelain knobs) shown below that was used prior to that, and which was often located on the face of the walls in a house retrofitted for electricity, though houses were also built new with such a system for wiring (before they figured out how—or simply trusted—to run it through the walls as they’d done with gas piping, I guess). The conduit had a faceplate designed to fit in with the other moldings in the room, more or less, and was easy to access by pulling off the wood face plate.

Here’s an example from the basement of a house built a year before ours where the basement light switches (of a now-rare rotary type, only used in the service areas of the house) are fed by the original wood conduit.
(Thanks to videos by the historic Glessner House in Chicago, whose coherent explanations of some of these early electrical details were to helpful to drawn from.)
What’s the danger with knob and tube? I don’t know squat about electricity, honestly, but a little reading online tells me that it’s a two-wire system and so it isn’t grounded. While some people say RIP IT ALL OUT IMMEDIATELY, or don’t buy a house if your inspection turns up any (like we can be so choosy around here!), cooler heads say that as long as it’s not subject to faulty repairs (which happens easily, apparently) and it’s doing a job where it won’t be overloaded (as in our ceilings) AND it’s not in contact with other materials (like people stepping on insulation in a ceiling and compacting the material around it), then it’s not inherently dangerous. That’s a lot of “if”s, frankly. In a situation like ours where the walls are all open on at least one side, giving us that once-in-110-years access to every shred of wiring, it would be irresponsible not to take care of the future problem. So we did.
Moving into the 21st century: our house had a 100 amp main panel and a 200 amp subpanel that was later added to the garage. Now we’ll have a much larger but cleaner and neatly-installed (set into the wall) 200 amp main panel, along with another subpanel in the basement. The change order for that was kind of painful, but we didn’t have much of a choice since we are going whole-hog on the electrical systems: hot water heater (heat pump), HVAC, stovetop (induction), fridge, and two electric car chargers all combine to demand a lot more than the standard electrical load of the recent past, even, let alone those few light bulbs and a toaster of a 1910 house.


The new panel, left, has the wires and conduit hidden behind the sheathing. The old rusty panel let it all hang out.
In the rush to make sure everything is ordered and that we don’t get caught by more shipping delays, I went ahead and ordered a bunch of light fixtures for the kitchen, back hall, and bathroom. Once they arrived we still had a few more to order, so, now that we could judge the size in the space, I met on site with the interior designer, who had brought paper templates to help us judge whether we had the proper scale for the fixtures. Looking at a 12” disk of paper stuck to the ceiling isn’t nearly as convincing as seeing the three-dimensional fixture, and there’s also the fact that the kitchen looks deceptively spacious right now, because there isn’t any cabinetry eating up space.

Hmm—it’s about this big…
How bright to make the kitchen? This was another factor where our prior experience with this space just isn’t relevant. The kitchen was lighted by only two bulbs: one in a ceiling fixture, and one in a flush-mount over the sink (the one over the range was unpleasantly bright, so we never used it. Also, it stopped working quite a while ago, like many other things in that kitchen). Now we will have four bulbs/fixtures, plus undercounter lighting (YEA!): two schoolhouse-globe fixtures in the ceiling (photo below) and two goosenecks, one over the sink and one over the island. The architect mentioned that having two fixtures over the sink lessens shadows as you lean over the sink to wash dishes, etc. I hadn’t noticed this before, so I had to test it when I got back home! Sure, if I leaned over far enough I could see a shadow. But there’s something visually more satisfying about a single fixture centered over an opening. And do I want to spend more money on multiples of these expensive fixtures? Naw.
Our source for most of the lighting is Rejuvenation. Their commitment to reproduction lighting appears to be wavering, but they have not jettisoned it completely. I can still get most of the hardware and fixtures I need for a bungalow interior from Rejuvenation. There are many other companies making similar reproduction-type fixtures, and you can certainly get a decent schoolhouse globe, semi-flush-mount for less than they charge, but they have the widest variety of finishes and sizes by far. I salvaged and polished the ones that I’d bought for the house when we moved in. Those from the old kitchen will be reused elsewhere in the house. I had given in to the romance of unlacquered brass at the time (meaning the fixtures looked terrible after seven years in the kitchen), but I have no more illusions as to whether I can handle a “living” finish! I can’t! I plan to put a coat of Renaissance Wax on these to stop them from tarnishing—uh, gaining any more patina—again. Now I just have to find that little pot of Ren Wax that I bought like a year ago.
With the overall level of historic features and finishes in the interior of the house (i.e., it’s not all that intact, or at least isn’t rich with historic features), I have NOT opted to invest in restored, historic fixtures. I know those people and those projects, and this is neither. But I do go for reproduction fixtures in favor of anything that “updates” the spaces.
And how to switch them? Well, some members of our household are partial to finding your phone and calling up an app to control the lights (a pain, in my opinion). We also use Google Home voice commands, which is fine for on/off but doesn’t work well to set it to the “tequila sunrise” setting or whatever the app version offers for control of our “smart” bulbs.
This house had no historic switches or light fixtures left when we bought it. When we first moved in we installed push-button light switches, which the house would have had originally (unless they were incredibly cheap and had rotary switches like the one above, but I don’t think even this house was that cheap!). It made a big difference in the “historic feeling” of the house. I like to get those reproduction switches and their plates from Classic Accents. At the moment, I am in a mental battle with current code, which dictates new-fangled vacancy sensors in certain types of spaces, meaning that I cannot have pushbuttons in key locations like the bathroom! I find this very upsetting.

YES, PLEASE.
This is what the switches in a 1910 house should look like. Nickel was the finish of choice for bathrooms and kitchens. In this example, the mother of pearl on both buttons indicates it’s a three-way switch. Otherwise, on a single-pole switch, the dark button is “off” and the light one is “on.” They used mother of pearl so that you can find it in a dim room.
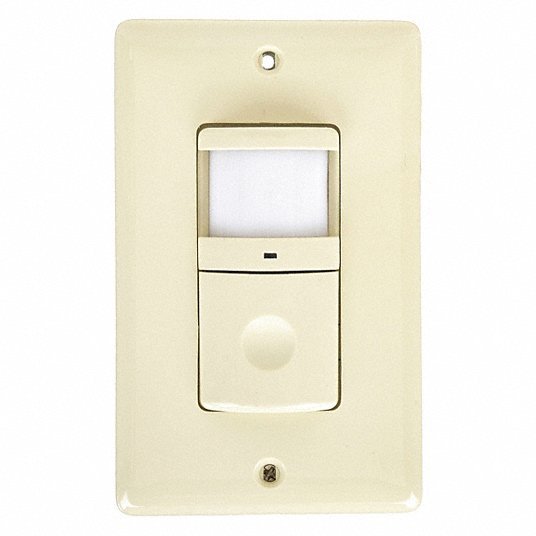
NO, THANK YOU.
I found a nice and ugly example of a vacancy sensor, didn’t I? Even where we have to use these, at least we will use nice matching metal plates like the one above, just with an appropriately-shaped opening.
That’s about all that is happening for now. However, as I write, the roof is almost done, the paint is starting to be removed from the interior woodwork and the window sashes, the exterior wood trim is being prepped and primed, AND new windows are being delivered imminently! So near-future posts, assuming I get around to writing them in a timely manner, promise to be more interesting than this one!